Saturday, December 12, 2009

We're Moving!

My Etsy shop will be on vacation mode for the next 2-3 weeks. Right during the busiest shopping time, I know, but it can't be helped, because we're moving!

My hubby and I have been wanting to move for most of the three years we've lived in this apartment. There were always practical concerns that prevented us. Could we afford it? Did we have time to go apartment hunting? Did we really want to pack up all our stuff? (I'm very averse to moving in general)

Last month we experienced an event at our apartment complex that scared the bejesus out of us. We no longer felt safe. We felt that our home had been violated (not our particular apartment, but the complex in general). So all of a sudden, those questions I posed above didn't seem to matter much. We were moving. After searching and coming up relatively empty-handed in our neighborhood of choice, I responded to a Craigslist ad and we went to see an apartment in an entirely different neighborhood. A neighborhood we hadn't really considered before. As soon as we walked through the front door, we loved the apartment. And we're moving into said apartment a week from today!


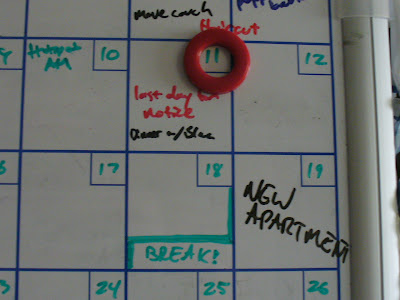
This is what Rosie thinks about us moving:


Actually, he really liked that couch, but we sold it. We've managed to fill our rather large apartment after three years, and since our new apartment is a bit smaller, we decided it was time to get rid of things. I'm heading over to Goodwill later to donate some of our stuff that we don't need. And then I'm going to buy some necessary ingredients for gingerbread cookies. Because as soon as we get into our new apartment, we're baking, decorating and eating gingerbread cookies while we watch Gargoyles. Yup, we're kinda strange like that.


Saturday, November 28, 2009

Caramel Sticky Rolls

This morning I decided to make cinnamon rolls. After looking through my red Betty Crocker cookbook I found something similar called "caramel sticky rolls."


So I gave it a try. Betty Crocker has instructions for making the dough using a bread machine. One and a half hours later, the dough was ready to shape.


There is both a filling, and a topping, but because these bake upside down, the first thing that goes into the pan is the caramel topping (brown sugar, corn syrup and butter), along with some pecans.


Then the rolls go on top, and they rise for half an hour or so.


This recipe calls for a 9x13 pan, but mine is currently on duty in the fridge with leftover green bean casserole, so I opted for two smaller pyrex pans. Once they come out of the oven, you turn them upside down onto a platter and let the caramel drizzle down.


Yum...


Here's a link to the recipe on the Betty Crocker website.


Friday, November 27, 2009

November Sunlight

Yesterday was filled with family, cooking, eating, knitting and good times. Today is quiet, thoughtful, and filled with sunlight.

Today I am thankful for the sunlight.


I am working on a produce bag using this pattern.


Holiday Sale!

Just a quick update to let you all know about my Etsy shop's Holiday Sale. All coaster sets are now $12, and lanyards are marked down to $4.

Etsy: Your place to buy & sell all things handmade
bethanthemum.etsy.com


Wednesday, November 11, 2009

watching the sun rise

I am a teacher. I live a hectic life. I often go to work in the dark, and come home in the dark. After the clock shift I have been getting to work in the early morning light, and so I began to notice the sunrise every morning. Depending on the day, sometimes I am still at home, and sometimes I am in the car. The first time it happened I was at home, and I felt so overjoyed that I ran to get the camera. I wasn't going to share those pictures online because, after all, who hasn't seen a beautiful sunrise? But some recent events have caused me to slow down a little, and appreciate the little moments of joy in my day. So I am sharing moments that brought joy to my heart, in the hopes that they bring joy to yours.


Sunday, November 1, 2009

Halloween 2009

Just a quick post to share some pictures.

Friday I made a double-batch of my favorite cookies. (recipe at the bottom)


I love fall baking. Mostly because I love using these spices.


These cookies stay amazingly moist, and disappear quite quickly.


And because Halloween is just not Halloween without some pumpkin carving/decorating, I humbly submit the following...

My husband's R2D2 pumpkin.


And my winky pumpkin.


Pumpkin Cookie Recipe

Ingredients:
• 2 ½ cups all-purpose flour
• 1 teaspoon baking powder
• 1 teaspoon baking soda
• 2 teaspoons ground cinnamon
• ½ teaspoon ground nutmeg
• ½ teaspoon ground cloves
• ½ teaspoon salt
• ½ cup butter, softened
• 1 cup white sugar
• ½ cup brown sugar
• 1 cup pumpkin puree
• 1 egg
• 1 teaspoon vanilla extract

Glaze:
• 2 cups confectioners' sugar
• 3 tablespoons milk
• 1 tablespoon melted butter
• 1 teaspoon vanilla extract

Directions:
1. Preheat oven to 350 degrees F. Combine flour, baking powder, baking soda, cinnamon, nutmeg, ground cloves, and salt; set aside.
2. In a medium bowl, cream together the 1/2 cup of butter and sugars. Add pumpkin, egg, and 1 teaspoon vanilla to butter mixture, and beat until creamy. Mix in dry ingredients. Drop on cookie sheet by tablespoonfuls; flatten slightly.
3. Bake for 15 to 20 minutes in the preheated oven. Cool cookies, then drizzle glaze with fork.
4. To Make Glaze: Combine confectioners' sugar, milk, 1 tablespoon melted butter, and 1 teaspoon vanilla. Add milk as needed, to achieve drizzling consistency.

I can't remember where I found this recipe, but it is amazing.

What is your favorite thing to bake in the Fall?


Sunday, October 18, 2009

Applesaucin'

Yesterday, with the help of some wonderful friends, I turned the 33 lbs of apples I picked last weekend into 22 pints of applesauce.

Before:


After:


I use a slow, but easy, method. First you cut and peel apples (I like to cut them into fourths, core them, then cut them into eighths and peel them... but it doesn't really matter as long as the cores and peels are gone). Then I load up a crock pot with as many apple pieces as I can fit. I borrowed two crock pots so I had three total to work with.


It's good to write yourself a note so you remember when to check on them.


Add some spices (and maybe sugar, depending on your taste buds... I didn't add any sugar this time and my applesauce is a little tart, but I like it that way), and turn the crock pot on high for about 3-4 hours.


Then give it a stir, spoon into mason jars and process in a water bath canner for 20 minutes. Simple as... applesauce. =)


I started the first crock pot at 10am, and finished processing the last jars at 8pm. Using slow cookers does slow things down, but I find it makes the process more relaxed (no need to monitor the apples while they cook, and if you cook it a little longer than you intended it's okay).

All in all it was a great way to spend a very rainy Seattle Saturday.


Sunday, October 4, 2009

Autumn is here!

Yesterday my husband and I went to South 47 Farm. We thought we'd pick some apples, but it turned out that they didn't have apples ready for picking. So we came home with squash instead. While we were there we wandered around the farm and saw many good things to eat. Here's a small sampling.


I can't resist feeding the farm animals. Say hello to the alpaca!


What we brought home:


From Trips to the Farm


Sunday, September 20, 2009

flame retardant fabric?

I decided to make my nephew some flannel pajama pants. When I mentioned this to my mother, she asked me to make sure the flannel was flame retardant. I thought that was strange, since I couldn't imagine why his pajamas, as opposed to his daytime clothes, would need special chemicals to make them less likely to burst into flames. I didn't think much of it as I headed to the fabric store. I figured, if it was so important, then I might as well abide by her wishes (and the law, apparently).

I shop at that big box fabric store. It's close to my house, has good prices and sales, and an amazing variety of fabrics and notions. I started browsing the huge aisle of "snuggle flannel" looking at all the cute patterns. I looked up and noticed that it was all on sale. Then I noticed the disclaimer on the sale sign: "not intended for children's sleepwear." Hmm... interesting. What else would you use such child-appropriate flannel fabric for if not for sleepwear? So I started looking for the aisle of sleepwear appropriate flannel fabric. I found all of five bolts of the special flame retardant fabrics. And they were about $10 more per yard. Huh? Something seemed wrong. So, I figured I'd get some flame retardant fabric and some of that "snuggle flannel" and figure it out at home. I found a cute pattern in the small selection of flame retardant flannel and bought a yard.

From sewing projects


Once at home I did some online research and found out that certain chemicals previously used to treat flame retardant fabric have been outlawed due to their harmful effects - mainly reproductive, neurological and liver-related. Yikes! The purpose behind the flame retardant fabric is to prevent children's bedtime clothing from catching fire. Apparently children are more likely to encounter fire sources in the early morning and in the evening (from stoves and the like). This made much more sense than worrying that your child's bed will catch on fire. Still, "better" fabric is no substitute for good parenting.

After finishing two pairs of pajama pants in the "snuggle" flannel, I decided to do something a little different with the third pair. I bought some ribbon to coordinate with each flannel print. On the first two pairs I added the ribbon to the pant legs. That was cute, but like I said I wanted to try something different this time. So I decided to make a small pocket to add to the pants. I'm not sure if my method is the best method, but here's what I did. First, I cut a 4" x 4" piece of fabric, centered on one of the jungle animals. I chose the hippo because it's just gosh darn cute.

From sewing projects


From sewing projects


Then I used a little bit of stitch witchery to hold the ribbon in place while I sewed (I used this same technique with the other two pairs of pants).

From sewing projects


I folded the fabric down so that the ribbon would be the top of the pocket, and sewed it in place.

From sewing projects


From sewing projects


I also sewed the bottom, framing the hippo print.

From sewing projects


Then I sewed the sides in place and trimmed all the extra fabric.

From sewing projects


That's it for now. I'll post pictures of the finished pants later.

I would like to add that I noticed a strange and unpleasant smell when I ironed the flame retardant fabric. I also noticed that the fabric feels different, and I had a few problems sewing the fabric with my machine (which in all fairness could have been my machine -- it's very old, and I'm still figuring out how to best use it). I will definitely not buy any more in the future, but I feel it would be wasteful to not use the fabric that I already bought.


Saturday, September 19, 2009

Dinosaur PJ Pants!

After I finished the first pair of flannel pj pants for my nephew Daniel, my mother smartly suggested that I send the pants to Virginia before I make any more -- to make sure they fit. Smart lady, my mom. I heard back from my mom yesterday and found out two things:

(1) the pants fit well, except for the waist
(2) my nephew really liked the pattern -- he kept pointing to the lizards

Lucky for me, my mother is not only very smart, but she's great at sewing. When I was a kid she made me pjs and dresses. So she's going to make adjustments on the first pair, while I made the changes for the second pair. And here they are...

From sewing projects


From sewing projects


From sewing projects


I hope to get some pictures of Daniel wearing these pants soon. When I do I'll post them so you all can see how adorable he is.

I have one more pair to make. The third pair is going to be made from flame retardant fabric. When I was at the fabric store last week I bought some flame retardant fabric as well as non-flame retardant fabric. I wasn't sure what the deal was, so I thought I'd get some just to be safe. Turns out it really wasn't necessary and I wish I hadn't spent the extra money. The flame retardant fabric is about $10 more per yard than the regular flannel. But since I already bought it, I might as well turn it into something useful.


Sunday, September 13, 2009

Flannel PJ Pants

After talking with my mom about the types of things my nephew will need this Fall and Winter, I decided that I would make him some pajama pants. Now, I've never made pajama pants, ever. Not even for adults. So the prospect of making some itty ones for my two-year-old nephew was a little daunting. But I always remind myself that each time I sew, I get better at it. And any mistakes I make can be remedied with my trusty seam ripper. Luckily this time, the seam ripper was not needed. Here's what I made:

From sewing projects

I found this cute lizard flannel at the store today. It's not flame-retardant, but after reading up on the pros and cons, I decided that it's okay. If my nephew ever finds himself in a burning bed, what he's wearing will be the least of his concerns. And if I can keep some icky chemicals away from his bare skin, I think I've done a good thing.

From sewing projects

The pants have an elastic waist, and some ribbon detail on the pant legs.

From sewing projects


I have two more pairs of pants to go, but I will save those for another day. One will have dinosaurs, while the other has jungle animals. This kid will be warm and cute, for sure.


Sunday, September 6, 2009

Making Pesto

Yesterday I headed up to South 47 Farm in Redmond, WA and brought home an $8 bag of fresh basil.
From cooking & baking

The smell alone was worth the trip. Today I turned that basil into pesto for the freezer. I used their pesto recipe (below), with two changes: I substituted sunflower seeds for pine nuts, and I omitted the Parmesan cheese since I planned to freeze the pesto. After defrosting, and before serving, I will add the cheese. I've had plenty success freezing cheeses by themselves after shredding them (mostly cheddar and mozzarella), but I didn't want to risk my pesto batch by freezing a cheese mixture. Anyway, here's their recipe:

2 cups firmly packed fresh basil
1/2 cup olive oil
4 cloves garlic
1/4 cup pine nuts (I used sunflower seeds)
3/4 cup fresh grated Parmesan or Romano cheese

I washed the basil, after pulling the leaves off their stems, combined everything into my food processor and blended until smooth.
From cooking & baking

From cooking & baking

I bought some Ball plastic freezer containers for the first time, and managed to fill all 5 (they are 8 oz each, so 1 cup) and have enough pesto left over to fill an ice cube tray. I used extra virgin olive oil for about half the pesto I made. I ran out of extra virgin so I used pure olive oil for the remaining pesto. I labeled each freezer container with the type of olive oil used (I am curious to see if I can taste the difference) and instructions about how much cheese to add.
From cooking & baking

From cooking & baking

I can't wait to try out my homemade pesto. While I love pesto, I don't eat it often, as the price at the grocery store can be a deterrent. I plan on using it for pasta, pizza sauce, and anything else I can think of.